Goals
To access this section, follow these steps:
- Log in to your account.
- Navigate to the sidebar on the left-hand side of the dashboard.
- Click on Performance.
- Select the "Goals" tab.
The Goals section allows users to define, monitor, and track performance targets across different brands, countries, marketplaces, and metrics. It helps users measure progress against predefined objectives and receive alerts based on selected frequencies.
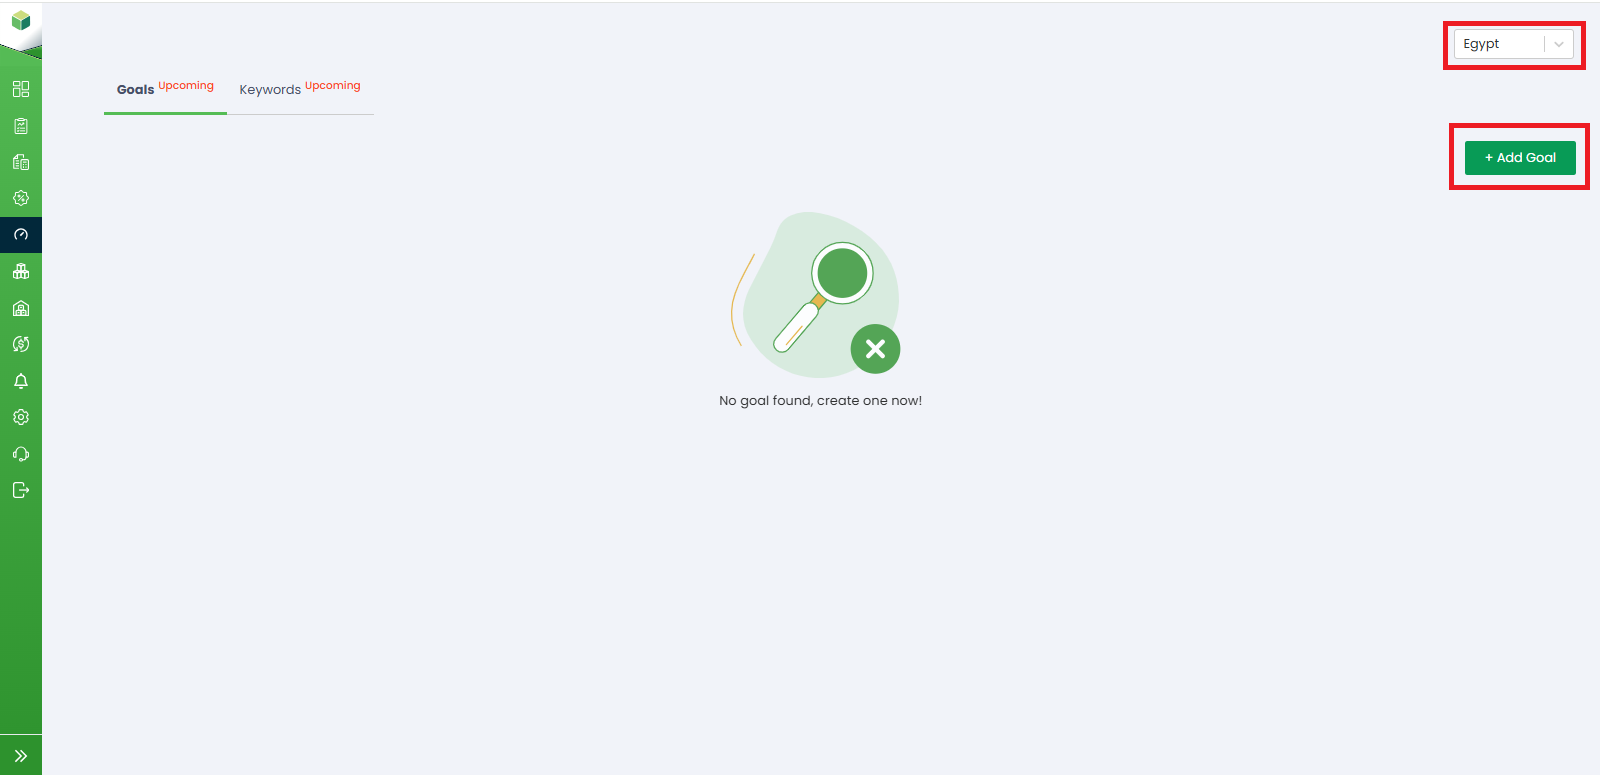
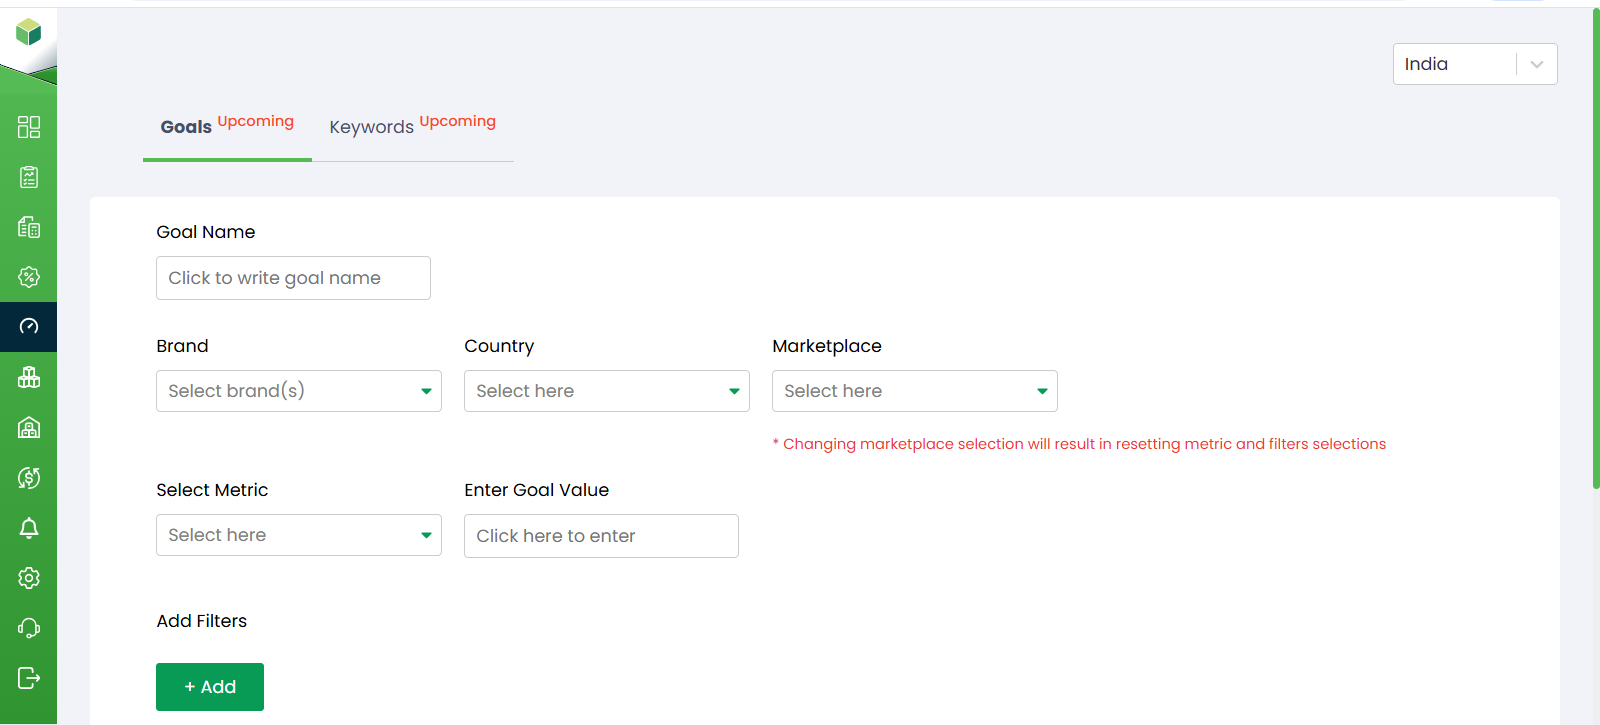
1. Selecting Country: In the upper-right corner of the page, users can select their preferred country or region from the dropdown menu. The displayed goals and performance data will correspond to the selected country.
2. Add Goal: Click the + Add Goal button to create a new performance goal.
a. Goal Name: Enter a unique name for the goal to help identify and track it easily.
b. Brand: Select the brand for which the goal is being created.
c. Country: Choose the country associated with the selected goal.
d. Marketplace: Select the marketplace where the goal will be tracked.
Note: Changing the marketplace may reset previously selected metrics and filters.
e. Select Metric: Choose the performance metric you want to monitor, such as sales, advertising performance, orders, or other available KPIs.
f. Enter Goal Value: Specify the target value that you want to achieve for the selected metric.
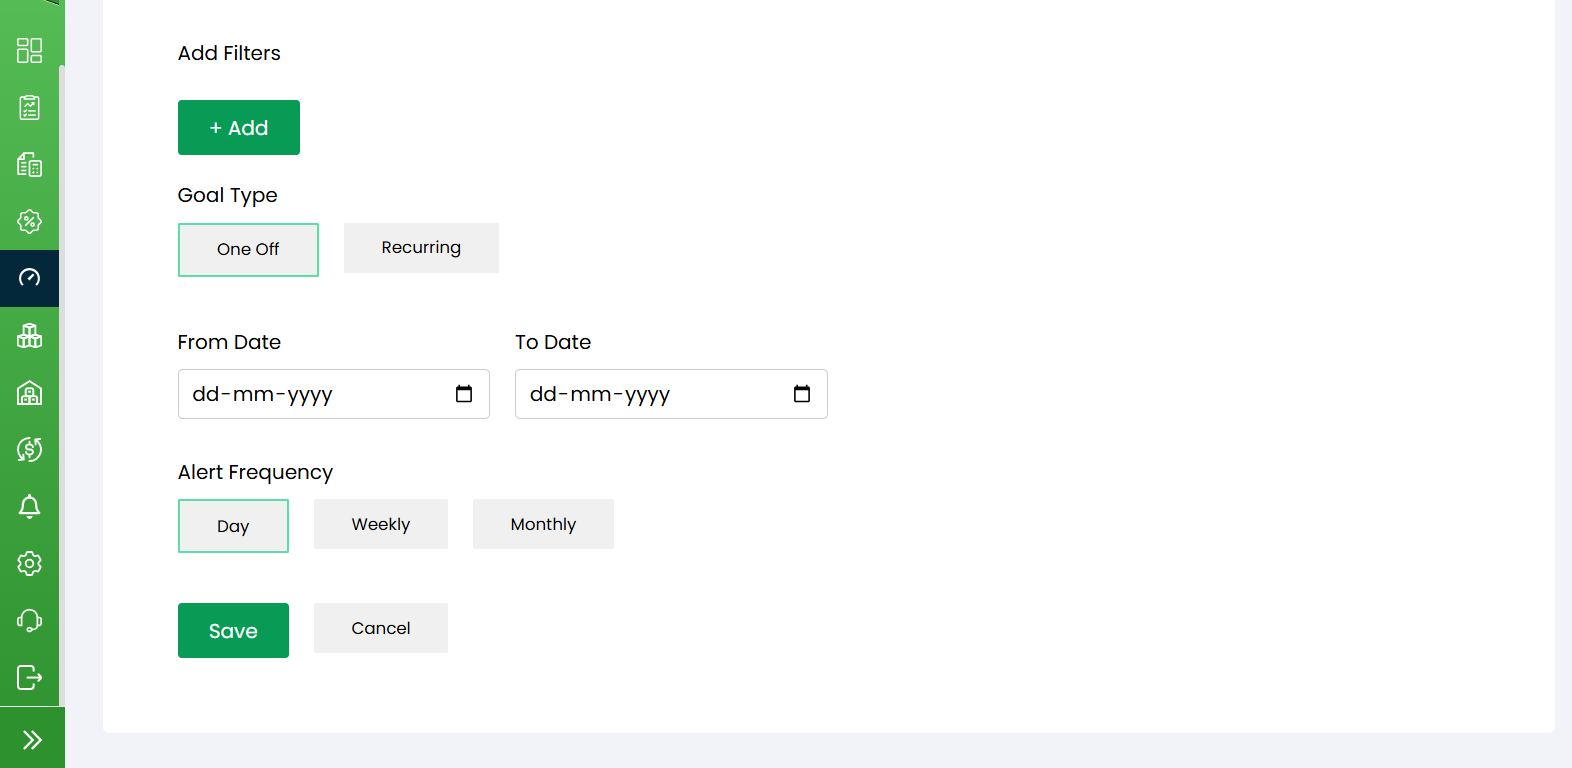
g. Add Filters: Click the + Add button to apply additional filters and refine the goal based on specific business requirements.
h. Goal Type: Users can choose one of the following goal types:
- One Off: Creates a goal that is monitored for a specific date range.
- Recurring: Creates a repeating goal that is monitored continuously according to the selected schedule.
i. From Date: Select the start date for goal tracking.
j. To Date: Select the end date for goal tracking.
k. Alert Frequency: Choose how often notifications should be generated regarding goal performance:
- Daily – Receive updates every day.
- Weekly – Receive updates once per week.
- Monthly – Receive updates once per month.
l. Save: Click Save to create and activate the goal.
m. Cancel: Click Cancel to discard the entered information without creating the goal.
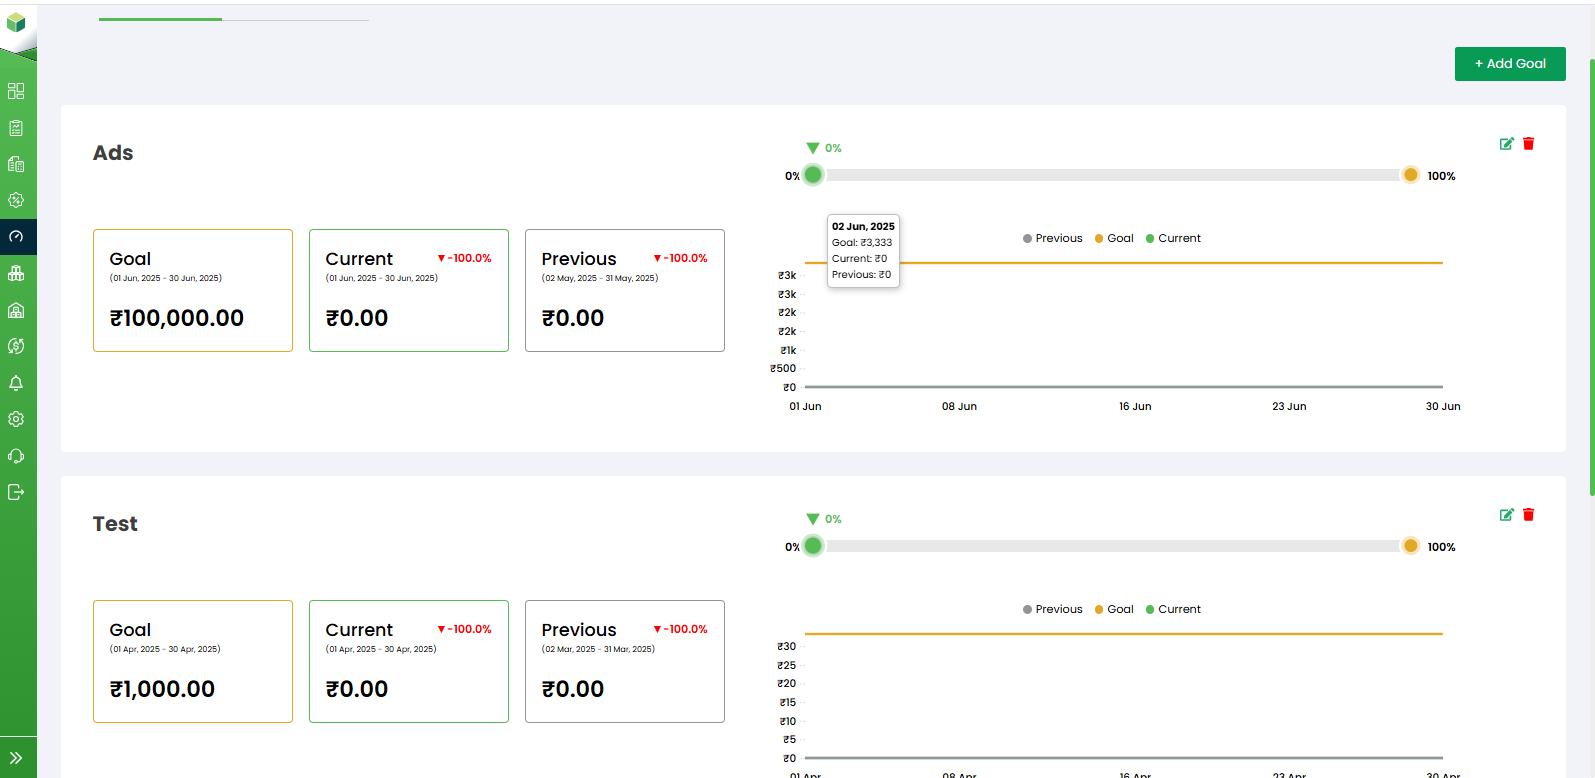
Once a goal is created, it appears on the dashboard where users can monitor its progress.
Goal Value: Displays the target value that has been set for the selected metric and date range.
Current Value: Shows the current performance achieved against the goal.
Previous Value: Displays performance from the previous comparison period, allowing users to evaluate trends and growth.
Progress Indicator: The progress bar visually represents how much of the goal has been achieved, showing the current progress percentage against the target.
Performance Chart : The graph displays:
- Goal – Target performance line.
- Current – Current period performance.
- Previous – Previous period performance.
This helps users compare actual performance against goals and historical results.
Edit Goal: Click the Edit icon to modify an existing goal, including its target value, filters, date range, or notification settings.
Delete Goal: Click the Delete icon to permanently remove a goal from the dashboard.